Community
How to create your own AI chat with angular
Building a seamless AI chat experience using Angular

In this article, we will explore how to create your own AI chat application using Angular. We will dissect a provided Angular component, explain its functionality, and refactor it for better readability and maintainability. By the end of this guide, you will have a solid understanding of how to build an AI-powered chat interface using Angular.
Creating the component
The provided Angular component, AiChatContainerLiteComponent, is responsible for managing the chat interface, sending messages to an AI service, and displaying the responses.
@Component({
  selector: 'ai-chatgem-container-lite',
  templateUrl: './chatgem-container-lite.component.html', // Assuming this file exists
  standalone: true,
  providers: [ApiService],
})
export class AiChatContainerLiteComponent implements OnDestroy {
  userPrompt: string = '';
  messages: { role: 'user' | 'model'; parts: { text: string }[] }[] = [];
  isGeneratingResponse: boolean = false;
  private unsubscribe$ = new Subject<void>();

  constructor(private readonly _apiService: ApiService) {}

  sendPrompt() {
    if (!this.userPrompt || this.isGeneratingResponse) return;
    this.isGeneratingResponse = true;

    this.messages.push({
      role: 'user',
      parts: [{ text: this.userPrompt }],
    });

    const requestPayload = {
      contents: this.messages,
    };

    this._apiService
      .sendToAi(requestPayload)
      .pipe(takeUntil(this.unsubscribe$))
      .subscribe({
        next: (response) => {
          const botMessage = response.candidates[0]?.content?.parts[0]?.text;
          if (botMessage) {
            this.messages.push({
              role: 'model',
              parts: [{ text: botMessage }],
            });
          }

          this.userPrompt = '';
          this.isGeneratingResponse = false;
        },
        error: (err) => {
          console.error('Error:', err);
          this.isGeneratingResponse = false;
        },
      });
  }

  cleanMemory() {
    this.messages = [];
  }

  ngOnDestroy(): void {
    this.unsubscribe$.next();
    this.unsubscribe$.complete();
  }
}
Your service should look like this
sendToAi(requestPayload: any): Observable<any> {
  return this.http.post(YOUR_ENDPOINT, requestPayload).pipe(
    take(1),
    catchError((err) => throwError(() => err))
  );
}
How to get your API keys
To interact with various AI resources, including the Gemini model, you can use a request similar to the following:
curl "https://generativelanguage.googleapis.com/v1beta/models/gemini-1.5-flash:generateContent?key=$YOUR_API_KEY" \
-H 'Content-Type: application/json' \
-X POST \
-d '{
  "contents": [{
    "parts":[{"text": "Explain how AI works"}]
    }]
   }'
This approach can be adapted for other AI models by adjusting the relevant endpoint and parameters accordingly.
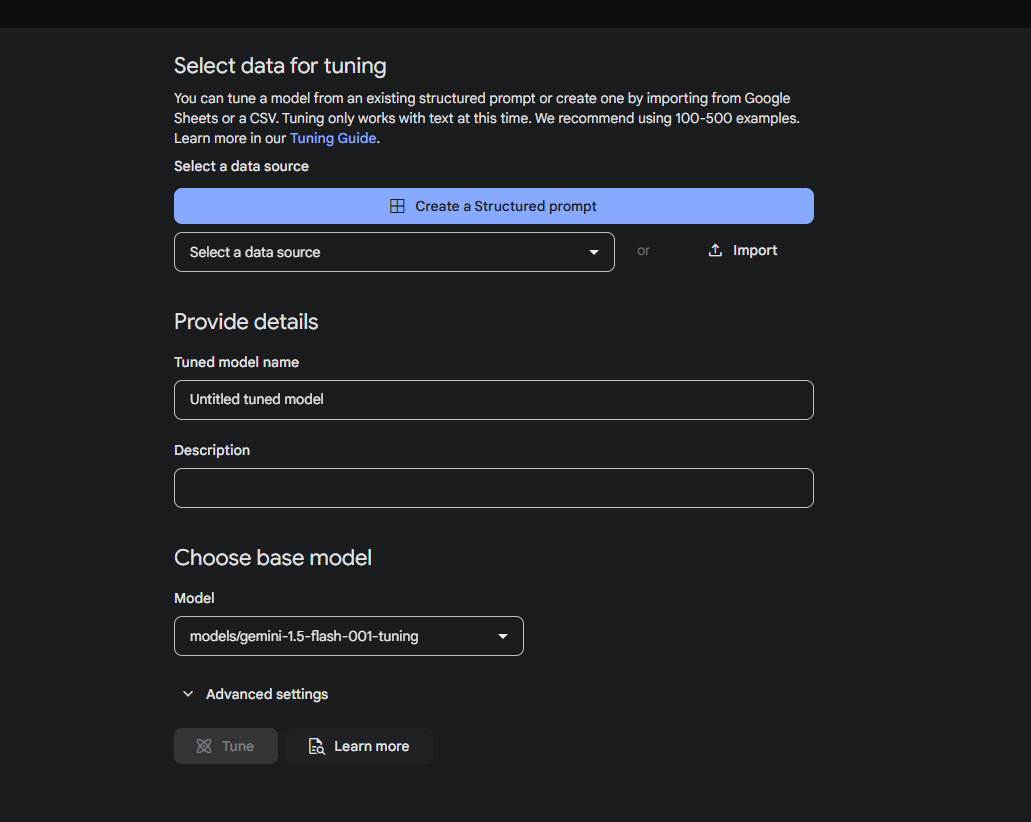
Tuning - How to make AI models like OpenAI's GPT or Gemini API
To make the Gemini API (or any AI model like OpenAI's GPT) answer questions only with information you've taught it, you need to use fine-tuning. Fine-tuning is a process that allows you to train the model with your own custom dataset, which enables the model to generate responses based specifically on the knowledge you've provided.
The goal of fine-tuning is to further improve the performance of the model for your specific task. Fine-tuning works by providing the model with a training dataset containing many examples of the task. For niche tasks, you can get significant improvements in model performance by tuning the model on a modest number of examples. This kind of model tuning is sometimes referred to as supervised fine-tuning, to distinguish it from other kinds of fine-tuning.
Fine-tuning with Gemini API (or OpenAI models):
Prepare Your Dataset: You need to create a dataset containing the information you want the model to learn. This dataset should be formatted to align with the input-output structure you want. For instance, you can have prompts paired with the correct responses based on your knowledge.
Fine-tune the Model: Once your dataset is prepared, you can upload it to the API platform and initiate the fine-tuning process. In Gemini, this would be done via an endpoint that supports custom training. Similarly, OpenAI provides an API for fine-tuning models, where you can upload your dataset and specify your custom training.
Model Usage: After fine-tuning, the model will respond to queries based on the dataset you’ve trained it with, ensuring that it only uses the knowledge from that dataset.
Limitations: Fine-tuning requires a solid dataset, and the model may not always perfectly generalize or stick strictly to the trained data. You may need to experiment with different prompt engineering strategies to ensure it adheres closely to your custom knowledge.


For example, with OpenAI you would use their fine-tuning API, and for Gemini, you'd follow their platform-specific fine-tuning steps. This process is essential for making the model respond with information you’ve taught it, and can be especially useful for creating custom solutions where you need domain-specific knowledge in the answers.
While not critical, it would be beneficial for the typing function in your AI to match the style of the others
typingEffect(text: string) {
    const wordsArray = text.split(' ');
    let wordIndex = 0;
    let typedText = '';

    const typeWord = () => {
      typedText += (wordIndex === 0 ? '' : ' ') + wordsArray[wordIndex++];

      this.messages[this.messages.length - 1] = {
        role: 'model',
        parts: [{ text: typedText }],
        uid: self.crypto.randomUUID(),
      };

      if (wordIndex === wordsArray.length) {
        this.isGeneratingResponse = false;
      } else {
        setTimeout(typeWord, 75);
      }
    };

    typeWord();
  }
Thank you for reading. If you found this article insightful, we invite you to leave a comment or share any questions you may have. We will respond as promptly as possible.
Happy coding!
Join to unlock full access and engage
Members enjoy exclusive features! Create an account or sign in for free to comment, engage with the community, and earn reputation by helping others.
Create accountMore from Angular DEV
Related Articles

The Future of Material Support in Angular
Recently, changes were announced for Google’s Material Web Components (MWC)

Using isolatedModules in Angular 18.2
Angular now has support for TypeScript isolatedModules as of Angular 18.2. With this support in place, we’ve seen performance boosts of up to 10% in production build times.

